
Welcome to Our Tutorial on Hosting Your Journey Sync Drive Using Docker Compose on Windows
This guide is designed to be easy to follow, with an estimated setup time of just 30 minutes.
Prerequisites
Before we begin, make sure you have the following:
- Windows Operating System
- Docker
- Dynamic DNS service (e.g. Ngrok)
Install Docker Desktop
- Go to Docker to download the Windows App.
- Install Docker.
- Open the “Docker” app.
- Accept the terms. Select “Use recommended settings” > “Finish”.
- Click on “Continue without signing in”.
Sign Up for Dynamic DNS Service
In this example, we’ll use Ngrok.
- Sign up for a free account on ngrok.
- Go to the ngrok Dashboard and get your Authtoken. You’ll need it in Step 6.
-
Select Windows and download the ngrok zip file.
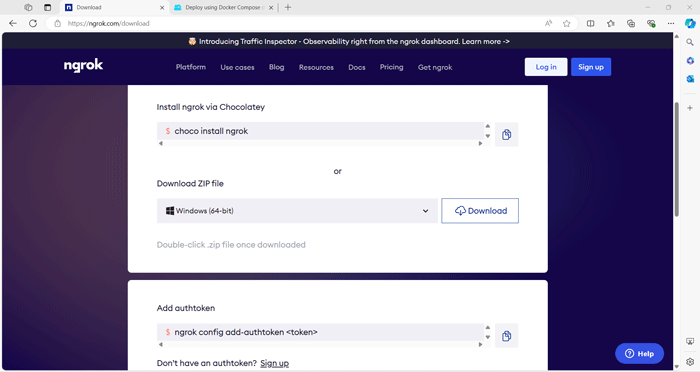
- Unzip the downloaded file and move it to a directory in your PATH.
- Open the command prompt and change the directory to your PATH.
- Run the following command:
ngrok config add-authtoken <token>(Replace<token>with the Authtoken from step 2) - Go to the ngrok Dashboard and create a domain. The domain should look like this:
<random>.ngrok-free.app. - Run the command:
ngrok http --domain=<random>.ngrok-free.app 8080.
Steps to Self-Host on Windows
Deploy Docker Images
- Visit the GitHub repository here and locate the
docker-compose.ymlfile. Download the file and open it in a plain text editor. In the YAML file, find and modify the following fields:
Replace the DOMAIN parameter with your domain name.
services:
  journey-sync-self-hosted-media:
    ...
    environment:
      DOMAIN: <random>.ngrok-free.app
    ...
  journey-sync-self-hosted-service:
    ...
    environment:
      DOMAIN: <random>.ngrok-free.app
    ...
Change the SIGNED parameter to a unique value.
services:
  journey-sync-self-hosted-service:
    environment:
      ...
      SIGNED: randomalphanumeric1
      ...
Modify ADMIN_JS_COOKIE_PASSWORD with a unique password.
services:
  journey-sync-self-hosted-service:
    environment:
      ...
      ADMIN_JS_COOKIE_PASSWORD: randomalphanumeric2
      ...
- Save
docker-compose.ymlin a designated directory. In this example, the PATH isC:\Users\<username>\Documents\journey. - Open Command prompt and change the directory to the PATH.
cd .\Documents\journey - Ensure that
docker-compose.ymlis within the folder.dir docker-compose.yml - Pull the images.
docker compose pull - Run the services.
docker compose up -d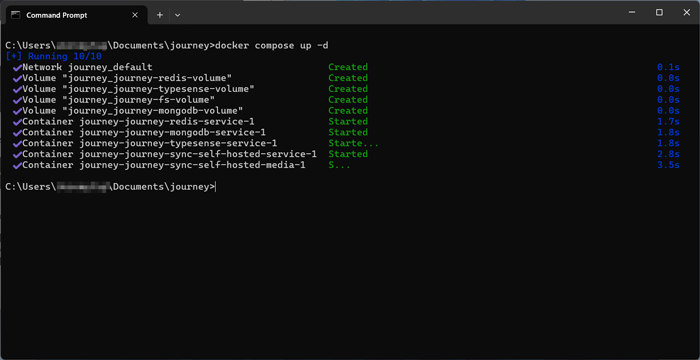
- Go to
localhost:8080in your browser. You should see that the Journey self-hosted server is installed.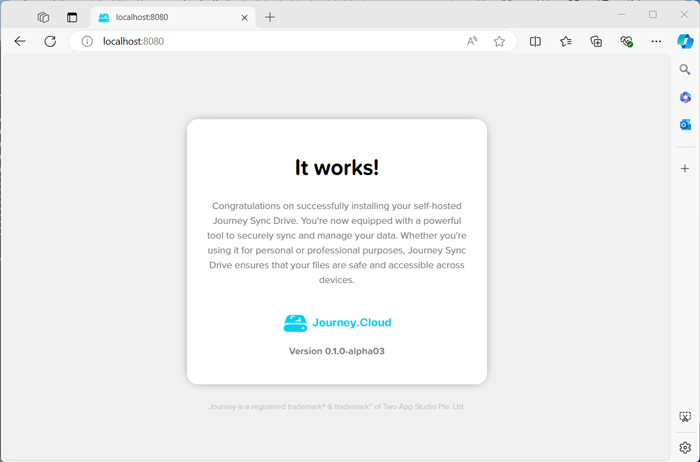
- Go to
<random>.ngrok-free.appin your browser. You should see that the Journey self-hosted server is installed.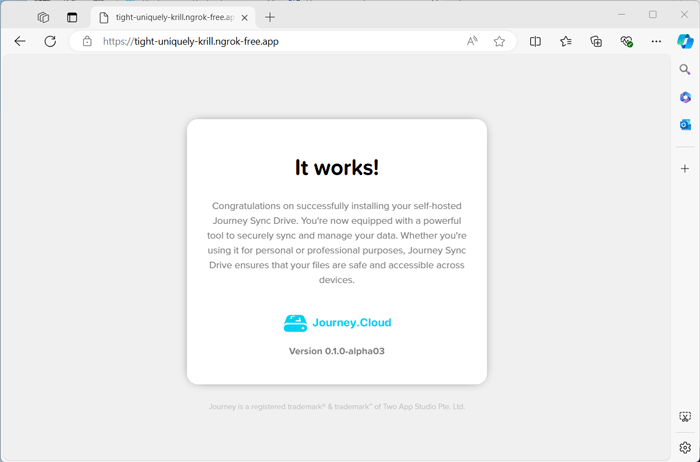
- Log in to the admin panel by going to
https://<random>.ngrok-free.app/admin.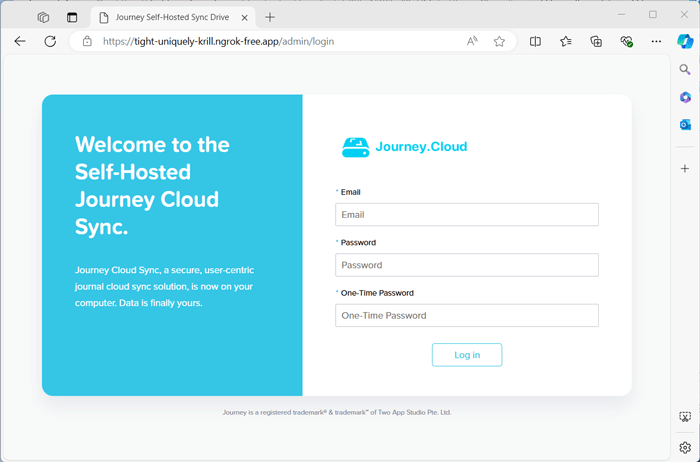
- Now, you need to locate your credentials. In the Docker app, click “Go to the dashboard” to open the Docker dashboard.
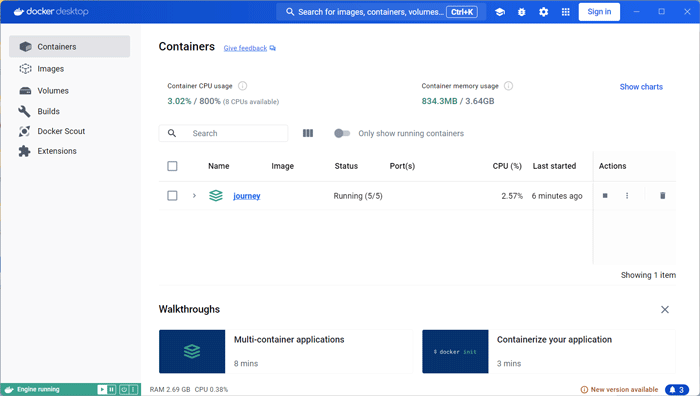
- In the “Containers” tab, expand the “journey” project. Click on the service with a name that starts with
journey-sync-self-hosted-service-running on port8080.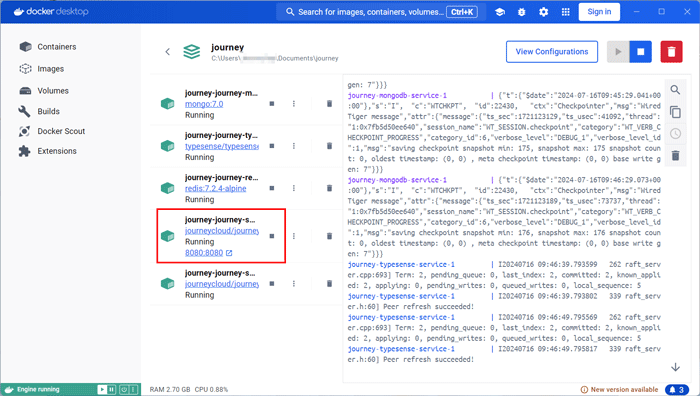
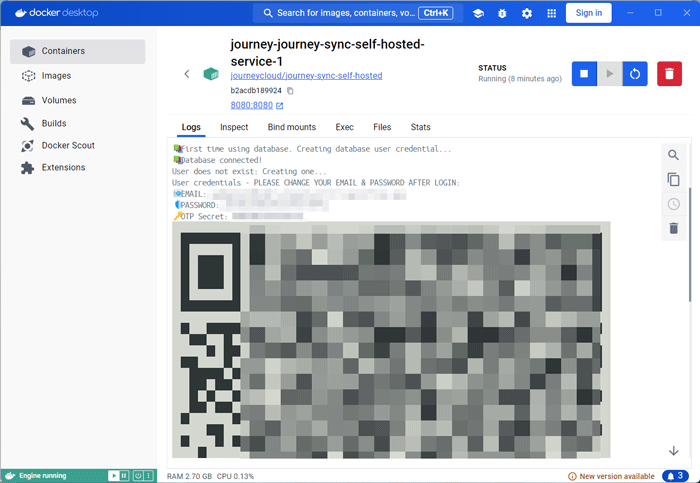
- Scroll the logs to retrieve the username and password. Copy the username and password into the admin login page. For OTP, use an authenticator app such as Authy. Enter the secret code or scan the QR code.
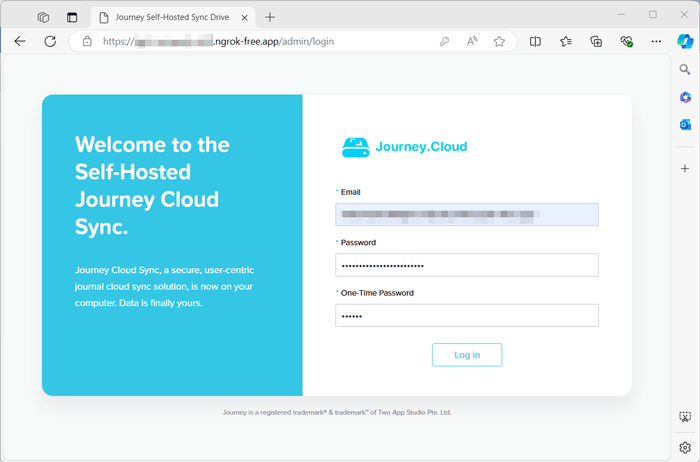
- Done! You are in the admin dashboard.
- Change the admin password. You may also add a new user.
- Follow the instructions here to add a new sync drive.
Update Journey Docker Images
- Journey self-hosted is updated from time to time. To update, go to the folder where
docker-compose.ymlis located.cd .\Documents\journey - Pull the images.
docker compose pull - Load the new images.
docker compose up -d